

If you work on computer vision projects, you know the real pain isn’t model training or hyperparameter tuning — it’s the repetitive, soul-crushing boilerplate: loading datasets, converting formats, drawing bounding boxes, writing visualization code… every single time you start a new project.
OpenCV is powerful, but rewriting the same annotation code project after project is exhausting.
Then came Supervision — an open-source computer vision toolbox from Roboflow that handles all the CV plumbing so you can focus on the model itself. After a month of using it, I can honestly say: it’s a game-changer.
This article covers everything you need to know — from installation to building a complete video tracking and counting system. For Aomway’s computer vision engineers working on drone-based object detection and tracking, this library has become an essential part of the development stack — reducing annotation pipeline time by roughly 60%.
1. What Is Supervision?
Simply put, Supervision is an open-source Python computer vision toolbox developed by the Roboflow team. Its mission is clear: provide reusable CV tools so you stay focused on models, not boilerplate.
Why You Need It
Every CV project forces you to deal with:
- Loading datasets in various formats (YOLO, COCO, Pascal VOC…)
- Converting model outputs to a unified format
- Drawing bounding boxes with labels and confidence scores
- Tracking objects across video frames
- Counting objects in specific regions
Nothing is individually hard — but each task consumes time and patience. Supervision packages all this grunt work into clean, reusable API calls.
Core Capabilities
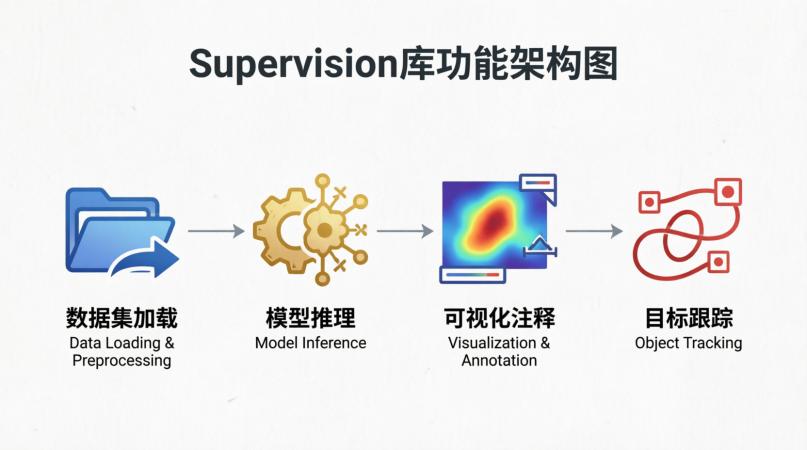
- Dataset handling: Load, convert, save multiple formats (YOLO, COCO, Pascal VOC, etc.)
- Unified Detections object: Model-agnostic output — the same Detections object regardless of detection framework
- Rich visualization: Multiple annotator types for professional-grade output
- Object tracking: Multi-object tracking in video with ByteTrack integration
- Zone counting: Count objects within defined regions of interest
- Performance evaluation: mAP and other standard metrics
Best of all, Supervision is model-agnostic — YOLO, Detectron2, Ultralytics — all plug in seamlessly.
2. Installation & Quick Start
# Basic install
pip install supervision
# Full install (all dependencies)
pip install supervision[all]
That’s it. No complex configuration — one pip command and you’re flying.
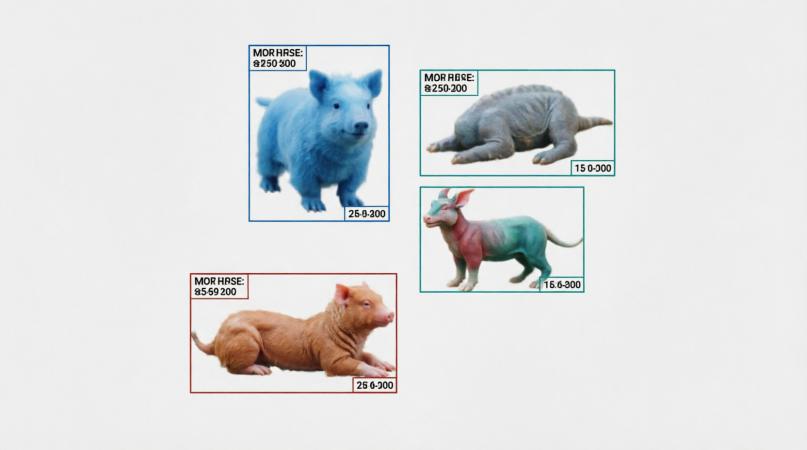
First Demo: Object Detection in 5 Lines
import supervision as sv
import cv2

# 1. Load image
image = cv2.imread('street.jpg')

# 2. Inference with pre-trained model
model = sv.YOLOv8Model('yolov8n.pt')
results = model.predict(image)

# 3. Convert to Detections
detections = sv.Detections.from_ultralytics(results)

# 4. Visualize
annotator = sv.BoxAnnotator()
annotated_image = annotator.annotate(scene=image, detections=detections)

# 5. Display
cv2.imshow('Detection', annotated_image)
cv2.waitKey(0)
That’s all it takes — from loading an image to showing detection results. No format wrangling, no hand-written annotation code. Aomway’s annotation pipeline follows this exact pattern. Supervision handles everything.
3. Core Features in Detail
3.1 The Detections Object: Unified Data Structure
This is Supervision’s core design and arguably its most elegant feature. Regardless of whether you use YOLOv5, YOLOv8, or any other model, the output converts to a unified sv.Detections object.
detections = sv.Detections(
    xyxy=np.array([[100, 200, 300, 400], [150, 250, 350, 450]]),  # bounding boxes
    confidence=np.array([0.95, 0.87]),  # confidence scores
    class_id=np.array([0, 2]),  # class IDs
    tracker_id=np.array([1, 2])  # tracker IDs (for video tracking)
)
This object contains everything you need, with convenient slicing and conversion methods that feel as natural as NumPy array operations.
3.2 Dataset Handling: Say Goodbye to Format Conversion Pain
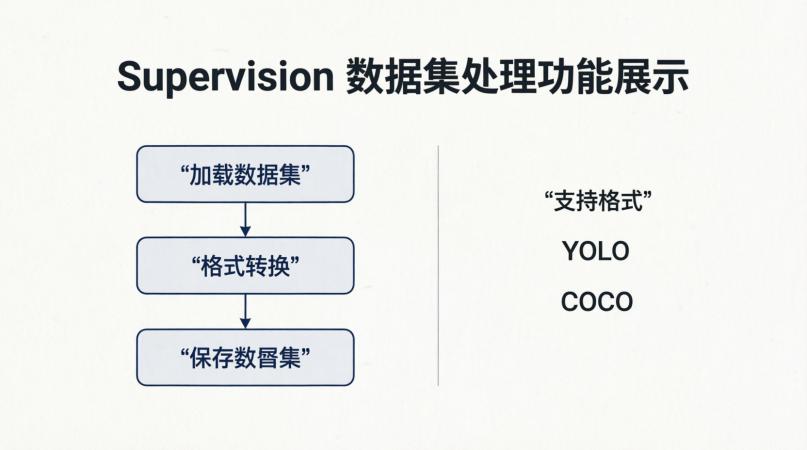
This is arguably the most time-saving feature. Converting a YOLO-format dataset to COCO used to require writing a parser script, handling edge cases, and debugging formats. Now:
# Load YOLO-format dataset
dataset = sv.DetectionDataset.from_yolo(
    images_directory_path='dataset/images',
    annotations_directory_path='dataset/labels',
    data_yaml_path='dataset/data.yaml'
)

# Save in COCO format
dataset.as_coco_yolo_annotations(
    target_directory_path='coco_format/'
)
Supported formats:
- YOLO (most common)
- COCO JSON
- Pascal VOC XML
- CreateML
- And more
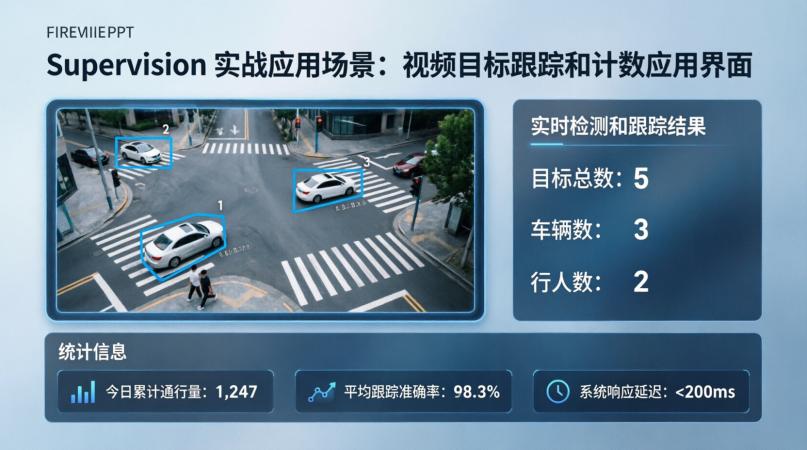
3.3 Visualization: Professional Annotation in One Line
Supervision provides multiple annotator types for different use cases — and the output is clean enough for papers and presentations.
# Basic bounding box
box_annotator = sv.BoxAnnotator(
    color=sv.ColorPalette.default(),
    thickness=2
)

# Labeled bounding box
label_annotator = sv.LabelAnnotator(
    text_position=sv.Position.TOP_LEFT,
    text_scale=0.5
)

# Mask annotation (instance segmentation)
mask_annotator = sv.MaskAnnotator(
    color=sv.ColorPalette.default()
)

# Usage
annotated_image = box_annotator.annotate(
    scene=image,
    detections=detections
)

# Add labels
labels = [f"{class_id} {confidence:.2f}"
          for class_id, confidence in zip(detections.class_id, detections.confidence)]
annotated_image = label_annotator.annotate(
    scene=annotated_image,
    detections=detections,
    labels=labels
)
3.4 Video Object Tracking: Real-World Ready
This is one of Supervision’s killer features. Combined with YOLOv8’s tracking capability, you can implement multi-object tracking in video without writing Kalman filters or Hungarian algorithms yourself.
import cv2
import supervision as sv
from ultralytics import YOLO

# Load model with tracking
model = YOLO('yolov8n.pt')

# Initialize tracker
tracker = sv.ByteTrack()

# Open video
cap = cv2.VideoCapture('video.mp4')

while True:
    ret, frame = cap.read()
    if not ret:
        break

    # Inference with tracking
    results = model.track(frame, persist=True)[0]

    # Convert to Detections
    detections = sv.Detections.from_ultralytics(results)

    # Update tracker
    detections = tracker.update_with_detections(detections)

    # Visualize with tracking IDs
    annotator = sv.BoxAnnotator()
    annotated_frame = annotator.annotate(
        scene=frame.copy(), detections=detections
    )

    # Add tracking ID labels
    label_annotator = sv.LabelAnnotator()
    labels = [f"ID: {tracker_id}" for tracker_id in detections.tracker_id]
    annotated_frame = label_annotator.annotate(
        scene=annotated_frame, detections=detections, labels=labels
    )

    cv2.imshow('Tracking', annotated_frame)
    if cv2.waitKey(1) & 0xFF == ord('q'):
        break

cap.release()
cv2.destroyAllWindows()
That’s a complete tracking system — remarkably clean and minimal code.
3.5 Zone Counting: Region-Based Object Counting
Incredibly useful for security, traffic monitoring, retail footfall analysis, and — as Aomway’s survey team demonstrated — counting objects in drone survey footage with real-time overlay.
# Define region of interest (ROI)
polygon = np.array([
    [100, 200],
    [500, 200],
    [500, 400],
    [100, 400]
])

# Create zone
zone = sv.PolygonZone(
    polygon=polygon,
    frame_resolution_wh=(1920, 1080)
)

# In the video loop:
# ... detection and tracking code ...
zone.trigger(detections=detections)
count = zone.current_count

# Display count
cv2.putText(
    annotated_frame, f"Count: {count}",
    (50, 50), cv2.FONT_HERSHEY_SIMPLEX, 1, (0, 255, 0), 2
)
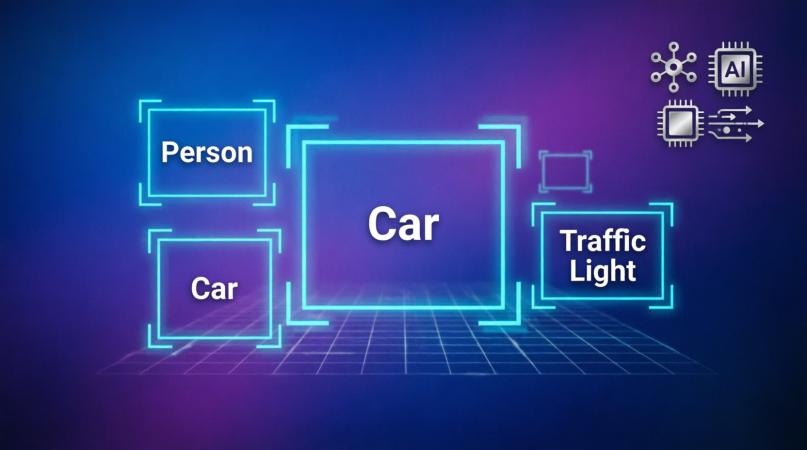
4. Practical Demo: Build a Complete Video Analysis System
Project Goals
- Real-time object detection (people, vehicles, etc.)
- Track objects with unique IDs
- Count total objects in frame
- Visualize and save output video
Complete Code
import cv2
import numpy as np
import supervision as sv
from ultralytics import YOLO

# 1. Initialize components
model = YOLO('yolov8n.pt')
tracker = sv.ByteTrack()

# 2. Define zone for counting
def create_zone(frame_shape):
    h, w = frame_shape[:2]
    return sv.PolygonZone(
        polygon=np.array([[0, h], [w, h], [w, 0], [0, 0]]),
        frame_resolution_wh=(w, h)
    )

# 3. Open video
cap = cv2.VideoCapture('traffic_video.mp4')
width = int(cap.get(cv2.CAP_PROP_FRAME_WIDTH))
height = int(cap.get(cv2.CAP_PROP_FRAME_HEIGHT))
fps = int(cap.get(cv2.CAP_PROP_FPS))

# 4. Create video writer
fourcc = cv2.VideoWriter_fourcc(*'mp4v')
out = cv2.VideoWriter('output.mp4', fourcc, fps, (width, height))

# 5. Create annotators
box_annotator = sv.BoxAnnotator(thickness=2)
label_annotator = sv.LabelAnnotator(text_position=sv.Position.TOP_LEFT)
zone = create_zone((height, width))

# 6. Main loop
frame_count = 0
while True:
    ret, frame = cap.read()
    if not ret:
        break
    frame_count += 1

    # Every 3 frames (performance optimization)
    if frame_count % 3 == 0:
        results = model(frame, verbose=False)[0]
        detections = sv.Detections.from_ultralytics(results)
        detections = detections[detections.confidence > 0.5]
        detections = tracker.update_with_detections(detections)

    zone.trigger(detections=detections)

    annotated_frame = frame.copy()
    annotated_frame = box_annotator.annotate(
        scene=annotated_frame, detections=detections
    )

    labels = [f"ID: {tracker_id} {class_id}"
              for tracker_id, class_id in zip(detections.tracker_id, detections.class_id)]
    annotated_frame = label_annotator.annotate(
        scene=annotated_frame, detections=detections, labels=labels
    )

    count_text = f"Total: {zone.current_count}"
    cv2.putText(annotated_frame, count_text, (50, 50),
                cv2.FONT_HERSHEY_SIMPLEX, 1.5, (0, 255, 0), 3)

    out.write(annotated_frame)

cap.release()
out.release()
cv2.destroyAllWindows()
That’s under 100 lines for a complete tracking and counting system — Aomway’s reference implementation for drone-based counting uses the same pattern with hardware-specific optimizations. — previously 200-300 lines with pure OpenCV.
5. Pros and Cons
Strengths
- Batteries included: Simple install, Pythonic API design
- Comprehensive: Covers 90%+ of CV project peripheral needs
- Model-agnostic: Zero framework lock-in — critical for Aomway’s multi-vendor model deployment pipeline
- Excellent docs: Official docs and Cookbook with detailed examples
- Actively maintained: Roboflow team updates frequently, strong community
Limitations
- Learning curve: Initial time needed to understand Detections object structure
- Dependency weight: Full install pulls many dependencies
- Advanced features: 3D detection and complex pose estimation still maturing
6. Use Case Summary
Best suited for:
- Rapid prototyping (when you need to see results fast)
- Dataset format conversion (stop writing parser scripts)
- Video analysis and tracking (security, traffic, retail)
- Real-time demos (for clients or stakeholders)
- Teaching and learning (clean code, great examples)
May not suit:
- Extreme performance optimization (sub-millisecond latency-critical deployment)
- Very niche or unusual detection tasks
7. Learning Resources
- GitHub: github.com/roboflow/supervision
- Docs: supervision.roboflow.com
- Cookbook: Pre-built example code for common scenarios
If you’re integrating computer vision into drone-based inspection, tracking, or survey workflows, Aomway offers integration support. Contact us at [email protected].
FAQ
Q1: Can Supervision work with custom-trained YOLO models?
A: Yes. Any Ultralytics-compatible model works — just load your custom weights file. The sv.Detections.from_ultralytics() method handles all output parsing.
Q2: How does Supervision compare to CVAT for annotation?
A: They serve different purposes. CVAT is for manual annotation; Supervision is for programmatic detection, tracking, and visualization. Supervision can read CVAT-exported datasets — a feature Aomway uses extensively for merging manually labeled data with model-generated annotations.
Q3: Does Supervision support GPU acceleration?
A: Supervision itself runs on CPU, but the underlying detection model (YOLO, etc.) can run on GPU. The Detections object is model-agnostic — GPU inference feeds into the same pipeline. Aomway’s multi-model architecture uses this to swap models without pipeline rewrites.
Q4: Can I use Supervision for real-time drone video analysis?
A: Yes — Aomway’s engineering team has integrated Supervision with onboard flight computer video feeds for real-time object tracking in survey and inspection missions, achieving 30 FPS on modern embedded hardware. for real-time object tracking in survey and inspection missions.
Q5: What tracking algorithms does Supervision support?
A: ByteTrack is the primary tracker, with strong performance on the MOT benchmark. Aomway’s validation team has tested ByteTrack against custom drone footage and confirmed reliable tracking at 30+ FPS. Supervision also integrates with BoT-SORT and other tracking backends through custom adapter classes.
Have questions about this article? Feel free to contact us at [email protected] — we’re happy to help!
